-
Posts
4,098 -
Joined
-
Last visited
Content Type
Profiles
Forums
Events
Gallery
Store
Everything posted by skipper19
-
-

Oak 6/18 6/19
skipper19 replied to Sheepdog264's topic in New York Fishing Reports - Lake Ontario (South Shore)
Buddy and I was out yesterday 6/20. Very slow for us. Started in 200 FOW and about 3 miles west of port. Clear warm water on top 60 to 61 degrees. Kept a north troll going all the way to 31.5 north line and only found fair color starting around 375 FOW and out in 31 lines it became clear again. Ran 6 lines, mostly spoons, a couple flasher flies. Only two hits from steelhead that came unbuttoned after wild aerial displays in 380 to 500 fow. The lake has started transition and the temperature was cold below 28 feet, 45 and down degrees. Top 20 feet was warm. The temp had a narrow sharp drop in temp at 26 feet, 46 degrees. One fish hit a 30 down rigger, the other took a 100 foot copper run clean at the knot. Bad east winds all morning made a rocky ride. Can only get better as transition completely changes the game. Mark -
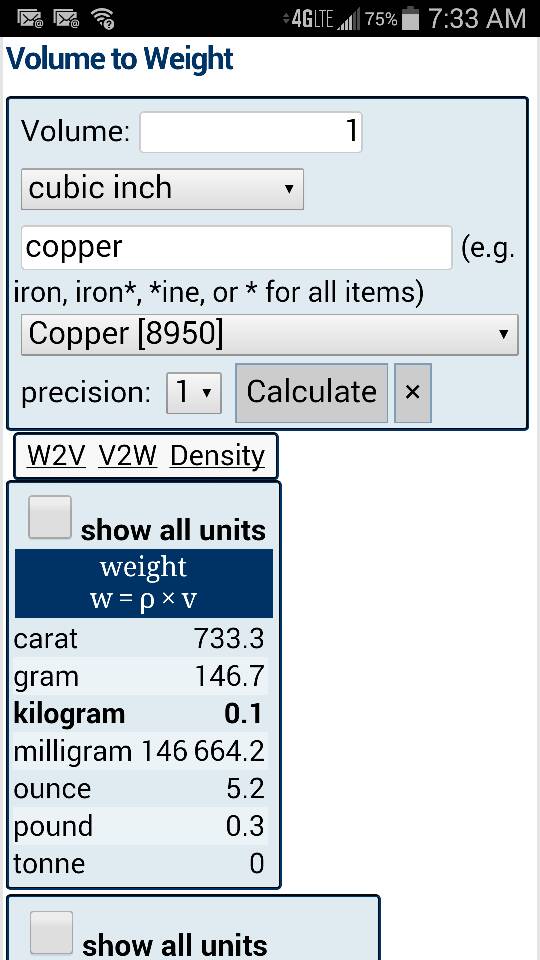
OK I will come again...wait..just good once as I ever was. Think of a 1 inch cube. Then cut power pro in 1 inch lengths. Lay the strands next to each other straight and tight. That's one row across the bottom of the cube that contains 90.91 strands st .011 thickness of the line. It would take the same amount of 1 inch strands to lay up the side of the cube and to fill the cube you would have to keep laying strands across 90.91 times until the cube is filled solid to the top. 90.91×90.91= 8,264.6 rounded to 8,265 one inch strands to fill the cube. You just cut 8,265 one inch strands of power pro to fill that little cube! Wow! That was a lot of scissor work. Hope this helps! 8265 inches divided by 12 inches in a foot equals 688.75 feet in that one inch cube. 689 rounded up. You can determine what NEW reel you want to buy to accommodate any combination of lines by working backwards with it. You want a reel to fit 100 feet of copper. You also want to use a monofilament buffer for flea repel when attaching diving devices, dive bomb, stackers, what ever, and a shock absorber for vicious striking kings. You don't want a reel that is like farm equipment and slow cause it's a short copper for kids or fisher women and meant to be an easy-to-use light rod and reel so you want some power pro on the bottom of the reel for backing to reduce the amount of volume and keep the rig small. You want a fast retrieve over 6 to 1 ratio and you know some reels fill that bill. You'll look for one based on those facts and what you want to put on it for lines. High speed and small search online reveals an Okuma clarion443 that could work. Three different lines and a 30 foot flouro leader. I want a reel that will be small but fit all three lines and don't want to measure all the braid out unless I have a good line winder and footage counter. Just so happens the tackle shop sells pre-measured power pro in 150 yard filler spools. That's 450 feet! We know already 689 feet is in a cubic inch so 450÷689= .65 cubic inch. OK the 100 foot copper is next cause that's the length we want. We already know that the calculation was 92.5 feet of 32 lb blood run will fit in a cubic inch. For simplicity I would just reserve a full cubic inch for the 100 copper. Now the variable is the monofilament middle section. Doesn't matter what it's length is as long as it is enough to repel fleas, give some stretching shock for strikes and provide a point to attach releases off of the copper to keep it from getting damaged. It also has to fill the rest of the volume on the reel after 1 cubic inch for copper and .65 cubic inch for power pro...total 1.65 cubic inch. The clarion 443 has a yardage capacity of 290 for 30 lb mono. We already know from previous calculation that 2066 inches of 30lb mono will fit a cubic inch. Divide that by 36 and you get 57.4 yards that fit the cubic inch. The reel holds 290 yards divided by 57.4 and equals 5.05 cubic inch capacity of the clarion reel. 5.05 - 1.65 (total consumed by braid and copper) =3.4 cubic inches left for the 30 lb mono middle section. 3.4 × 57.4 yards (in a cubic inch) = 195 yards rounded. Thats 585 feet for the mono middle section and the flouro leader 585 minus the 30 foot flouro leader leaving 555 feet of Ande or big game 30 lb mono. Make it 500 feet and you have a little comfort room left. Measure 100 feet out with a tape or a laser range finder and walk it to that point 5 times and reel the mono up tight on top of the braid. 950 feet total backing braid and mono on the reel. Roll on the 100 foot copper section, tie on your flouro leader and you are done. High speed and small reel. 950 total backing with mono and braid. 100 feet of copper 32 lb. And leader. Great for the ladies and kids and it's flexible to use from depths of 20 feet to 200 or more feet (stacked rigger cables.) 1.0 cubic inch for copper .65 cubic inch for braid 3.08 cubic inch for mono and leader 4.73 total cubic inches and that fits this clarion with .32 cubic inches breathing room left with a fast retrieve and smaller frame. I will buy that reel for this combination I want. Ok now go have fun!
-
Yes! Way Scott!..it works perfectly everytime. It's not difficult really if you try it once on a calculator. Simple multiplication and division and subtraction. I'm just a dumbass trucker....i got time on my hands too!
-
I say use a copulator...er um calculator!
-
Find the yardage capacity for a specific monofilament line on any reel you may have. Most will list it someplace on the reel itself or, look it up. Calculate it's cubic volume based on that data. The formula is based on a cubic inch volume for any given line and it's diameter in thousands of an inch. Therefore, if you find the data on the reel you have in your hand, you can find its volume capacity. The reel has inscribed data suggesting it will hold say 350 yards of 30 lb mono. For simplicity I have added data on thickness of popular lines used in most copper setups below. Power pro 30lb is .011 32 lb blood run is .030 45 lb blood run is .033 30 lb big game or Ande mono is .022 20 lb big game or Ande mono is .018 The formula needs a simple mathematical calculator. No special features. You know 350 yards of 30 lb mono will fit your reel you have. Now find its cubic inch volume. 1÷.022=45.45 ... now square that answer 45.45×45.45=2066 rounded up. That is how many inches of 30lb mono line will fit in a cubic inch. 36 inches are in one yard. Your reel holds 350 yards × 36 = 12,600 inches that fits your reel. Divide 12,600 by 2066 = 6.1 cubic inches rounded up. Your reel has a volume capacity of 6.1 cubic inches. Now you can easily find the combined volume of each line component commonly used in a copper setup for your specific reel. Keep in mind you can use this formula for any reel or combination of lines you want. This is an example. Most folks like to have about 900 feet of backing on coppers. Use that as your base to begin. It is first on your reel and dictates by diameter and length how much copper you can spool on AND leave room for a wind on flouro leader of up to 30 feet. Let's use power pro 30 lb braid. Some like 50 lb, but I find that 30 is enough and 900 feet of 30 takes less space than 900 feet of 50. Besides you are trying to get a specific length copper which is important for depth repeatability along with having enough backing for other deployment devices in play, such as, boards, or out riggers or stacking. Again the same formula applies. Find the backing volume required first. Power pro 30lb is. 011 diameter. 1÷.011=90.91 rounded up (notice it's half the .022 mono) 90.91×90.91=8,265 rounded up. That is the inches of 30lb power pro that will fit in 1 cubic inch. Divide it by 12 to get feet per cubic inch = 689 feet in one cubic inch. You want 900 feet of backing so 900÷689=1.31 cubic inches for your 900 foot backing. Your reel is 6.1 cu in and now the 900 foot backing will consume 1.31 of that. 6.1-1.31=4.66 cubic inch left for copper and leader. Now you can find out how much copper you can spool on. 32 lb blood run or 45 lb. That's the question. Let's do 32 lb first that has a .030 diameter. Same formula again. 1÷.030=33.33×33.33=1111 rounded up. 1111 inches of 32lb copper in a cubic inch. 1111÷12 = 92.5 feet in a cubic inch. You have 4.66 cubic inches on top of your backing calculation still remaining. So 4.66 × 92.5 = 431 You can fit 400 feet of 32 lb copper and a 30 foot 30lb wind on flouro leader! You want 45lb? (.033 diameter ) 1÷.033 = 30.30 × 30.30 = 918 ÷ 12 = 76.5 76.5×4.66=356 feet you can spool 330 feet of 45lb copper and a 30 foot flouro leader. I would make it a 300 45 lb copper and have a little room to spare. Any reel any line with diameter data and yardage capacity of your reel.
-
Find the yardage capacity for a specific monofilament line on any reel you may have. Most will list it someplace on the reel itself or, look it up. Calculate it's cubic volume based on that data. The formula is based on a cubic inch volume for any given line and it's diameter in thousands of an inch. Therefore, if you find the data on the reel you have in your hand, you can find its volume capacity. The reel has inscribed data suggesting it will hold say 350 yards of 30 lb mono. For simplicity I have added data on thickness of popular lines used in most copper setups below. Power pro 30lb is .011 32 lb blood run is .030 45 lb blood run is .033 30 lb big game or Ande mono is .022 20 lb big game or Ande mono is .018 The formula needs a simple mathematical calculator. No special features. You know 350 yards of 30 lb mono will fit your reel you have. Now find its cubic inch volume. 1÷.022=45.45 ... now square that answer 40.45×45.45=2066 rounded up. That is how many inches of 30lb mono line will fit in a cubic inch. 36 inches are in one yard. Your reel holds 350 yards × 36 = 12,600 inches that fits your reel. Divide 12,600 by 2066 = 6.1 cubic inches rounded up. Your reel has a volume capacity of 6.1 cubic inches. Now you can easily find the combined volume of each line component commonly used in a copper setup for your specific reel. Keep in mind you can use this formula for any reel or combination of lines you want. This is an example. Most folks like to have about 900 feet of backing on coppers. Use that as your base to begin. It is first on your reel and dictates by diameter and length how much copper you can spool on AND leave room for a wind on flouro leader of up to 30 feet. Let's use power pro 30 lb braid. Some like 50 lb, but I find that 30 is enough and 900 feet of 30 takes less space than 900 feet of 50. Besides you are trying to get a specific length copper which is important for depth repeatability along with having enough backing for other deployment devices in play, such as, boards, or out riggers or stacking. Again the same formula applies. Find the backing volume required first. Power pro 30lb is. 011 diameter. 1÷.011=90.91 rounded up (notice it's twice the .022 mono) 90.91×90.91=8,265 rounded up. That is the inches that will fit in 1 cubic inch. Divide it by 12 to get feet per cubic inch = 689 feet in one cubic inch. You want 900 feet of backing so 900÷689=1.31 cubic inches for your 900 foot backing. Your reel is 6.1 cu in and now the 900 foot backing will consume 1.31 of that. 6.1-1.31=4.66 cubic inch left for copper and leader. Now you can find out how much copper you can spool on. 32 lb blood run or 45 lb. That's the question. Let's do 32 lb first that has a .030 diameter. Same formula again. 1÷.030=33.33×33.33=1111 rounded up. 1111 inches of 32lb copper in a cubic inch. 1111÷12 = 92.5 feet in a cubic inch. You have 4.66 cubic inches on top of your backing calculation still remaining. So 4.66 × 92.5 = 431 You can fit 400 feet of 32 lb copper and a 30 foot 30lb wind on flouro leader! You want 45lb? (.033 diameter ) 1÷.033 = 30.30 × 30.30 = 918 ÷ 12 = 76.5 76.5×4.66=356 feet you can spool 330 feet of 45lb copper and a 30 foot flouro leader. I would make it a 300 45 lb copper and have a little room to spare. Any reel any line with diameter data and yardage capacity of your reel.
-

2015 Sandy Creek Shootout Big Fish Friday
skipper19 replied to JakeyBaby's topic in Tournament Talk, Shows, Events & Seminars
-

2015 Sandy Creek Shootout Big Fish Friday
skipper19 replied to JakeyBaby's topic in Tournament Talk, Shows, Events & Seminars
-
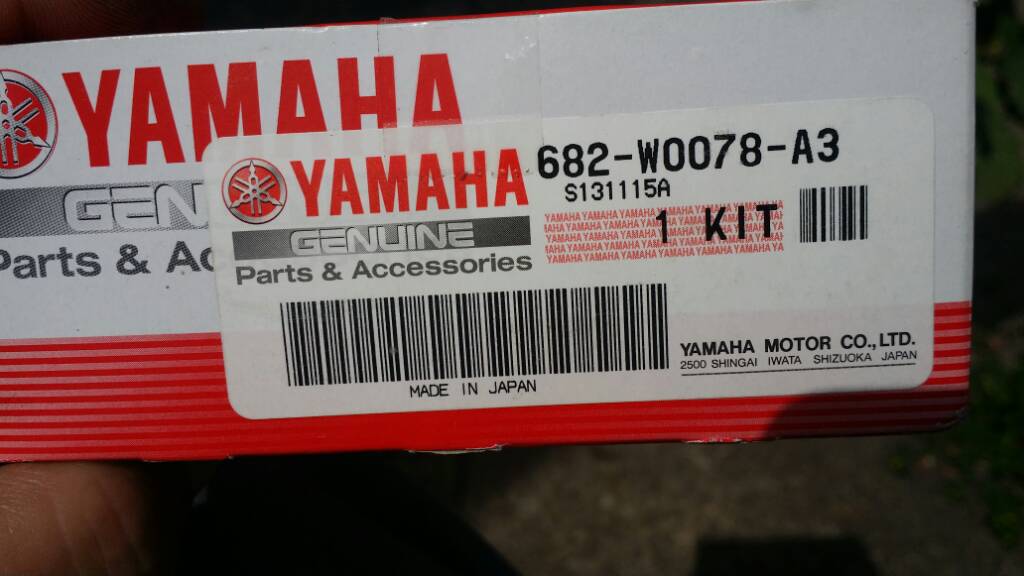
This diagram is from the boats.net site and has very detailed description of all parts of any systems in your model of engine. This particular diagram is for the fuel pump on my 9.9 mlhc and I replaced the diaphragms in the pump. The second picture is the kit part number for the water pump kit. This has been the best site for ordering do it yourself parts I have found. My OX66 225 YAMAHA has also been supplied parts by them for me to maintain the fuel injection system as well! Great site! boats.net Mark
-
Our marina in Point Breeze is swamped with work orders and I just needed to have a couple issues fixed on my little 9.9 Yammer 4 stroke. No water was coming from the pee hole and after checking it for wasp nests and spiders, pulled the stick for oil and oil gushed out!.. it was way overfull! Making oil is never good since it dilutes the sump oil and can wipe bearings pretty quickly. I can't wait for it to get fixed, so I took matters into my own hands and ordered parts from boats.net. I have made orders from them before and they are top notch in ease of part identification and part stock and over nite express shipping. Genuine manufacturer marine parts for most common motors, cowl to skeg. So after examination of the parts diagram related to my outboard, I ordered a couple diaphragm parts for the mechanical fuel pump to stop the gas going in the oil of the 4 stroke. Then ordered a complete water pump repair kit to get the water to the power head. I made a pictorial on the water pump job and for anyone who has a small amount of mechanical skills, it can be done very easily on this motor. My 9.9 model is a 2004 MLHC four stroke. So here is what you need for tools, supplies and time. Tool list is small. Stool to sit yer butt on! Shade, beers..time depends on how many beers..about an hour...maybe two... with more beers:unsure: Pliers One 12mm combination wrench or socket and ratchet. Two 10mm open end wrenches #2 Phillips screwdriver Medium Flat blade screwdriver Plastic hammer mallet.. brass will work too Supplies are water hose and jet stream spray nozzle, brake cleaner with the straw sprayer, rags, some type of lube for the impeller, petroleum jelly, oil, no solvents! ..I used some synthetic 75w 90 gear oil I had left from axle work. Here we go! First have your engine at a comfortable height.mine was on it's bracket and just right when I dollied the trailer up or down. Next get your stool and place it on the side of the motor leg with the engine tilted up. Then put your motor gear in reverse and look down the leg in front and find the space where your shift rod is visible. If you are in reverse gear there will be a connection you can see and will take apart with the two 10mm open wreches. Small nut is the locker of the larger brass nut which you turn the brass nut clockwise to disconnect the rod. Spin it only enough to disconnect...leave the lock nut backed off on the lower rod. Next get your 12mm wrench or socket and remove the 4 bolts holding the gear case to the leg. Hang onto it! It will slide right off. What you will have is the gear case and prop intact and the drive shaft and lower shift rod on the top side. That was easy! The water pump is on top of the gear case assembly with the drive shaft going into it and passing on into the gear case below. Don't worry, no disassembly of the gear case is necessary with this repair. Four bolts and two retainers are removed next from the top of the pump assembly, you need the 10mm wrench for that. Slide the top housing up off the drive shaft, it contains the impeller cup you will replace with new one in the kit. Then slide the impeller up off the shaft with the help of a screw driver if you need to break it free and use some oil on the shaft for help sliding it off. Now remove the half moon key from its slot in the shaft that pins the impeller in place. The rest of the parts slide off the shaft the same way. Wear plate, two gaskets and that is it for the pump. Everything else stays intact. Use the jet spray from the water hose and flush out any rubber pieces from the lower case seal area. Inspect it closely for any pieces lodged in the crevice of the seal and peck them out CAREFULLY! don't damage the seal! Brake cleaner can be used to clean the shaft so it is smooth and ready for reassemble. The water pump housing (plastic) has the metal cup lightly pressed into its cavity. Remove the two phillips screws on the opposit side, remove that part of the housing and pry out the rubber grommet. Then I used the flat screwdriver to remove the metal cup by coming through the opposite side and just catching the edge of the old cup with the blade while being sure not to rest the blade on the plastic housing, placed the handle of the screwdriver a hard surface and used the plastic hammer to strike the housing enough to dislodge it so I could grab the cup edge with pliers and remove it. Notice the tang and slot that mate together when reassemble of new cup in its cavity. Clean the cavity out and remove all pieces of rubber then lightly lube the inside of the cavity. Tap the new cup into place with the plastic hammer, being sure to align the tab into the slot in the cavity.The edge is nearly flush with the housing when fully seated. On the opposite side is the rubber grommet cavity you install the new grommet. It has a tapper on the inside diameter and doesn't matter which way it goes in. It is the seal for the water tube still up in the leg. It has a pointed end to help it align with the grommet when putting the lower unit back into the leg. Brass colored water tube in the leg Clean all the mating surfaces that have gasket seals, flush the water tubes goin down into the pickup screen above the gear case with the jet spray nozzel, and now assemble the parts in order that came off of the shaft. The grommet side of the pump housing goes towards the prop side as well as the wear plate and gaskets. It can go on backwards and you will not be able to put it into the leg to align with the water tube. In order here you go! Gasket Wear plate Gasket Half-moon key in the shaft slot Impeller next...KEY SLOT DOWN! lube the shaft so it slides easy and fit slot onto the key resting solidly to the wear plate. Then the assembled housing down the shaft and with a gentle twisting pessure action and some light lube, work the vanes of the impeller into the metal cup. Install the 4 new cap screws in the housing along with retainers and tighten cross pattern evenly. Be gentle it's plastic housing! That's it! Now the leg assembly comes next. Slide it back up in the leg while keeping the unit aligned evenly and "feel" the shaft into the power head. You can turn the prop back and forth to mesh the splines and the water tube should guide into the top of the water pump housing grommet as it seats up against the lower leg. Lightly install the four bolts holding the lower unit to the leg. Find that shift rod you took apart and connect them back together. Screw the brass connection nut back down to its original location and your gear shift lever should be close to adjustments. Then tighten the jam nut to it using two open end 10mm wrenches. Tighten the lower unit 12mm bolts evenly in cross pattern. I'm sure there is a torque spec but I don't know what it is. Just be sure not to over tighten because you are dealing with aluminum.. test it in water tub and never run the engine without water! Make sure your shift lever will engage forward, neutral and reverse. If not, adjust the brass nut on the rod and retighten the jam nut to hold it. All the junk and all the new! Hope this helps someone with a similar engine do the job themselves! Mark Sent on a Sprint Samsung Galaxy Note® 3
-

Wanted to say thanks to all !
skipper19 replied to fatboyjack1's topic in Questions About Trout & Salmon Trolling?
Adam! Very cool and gracious post! Hope your vacation is filled with good weather and great fishing! I might be around there this week end. I can tell you that the east pass out by the breakwall has a prop eater during low water. I always use the west pass now and if you do you will have no problems. Those posts at the end of the launch docks are a PIA..they jut out in the way so be aware of them while approaching as they have very sharp edges on the top of them, they have damaged many boats and fingers. I talked to the county parks commissioner about it years ago but it fell on deaf ears I guess. Fishing has not been too stellar for kings lately unless you run way off to 28 29 lines north only heard of a few caught. I haven't been fishing directly in front of port. Lots of coho down near devils nose and lake trout are everywhere around. There's been some good color and temp down by devil's nose but it is a long run to there down east and west winds if they prevail will likely send that color back towards sandy creek more. Hope the lake sets up with for you and you have good luck! If I'm around I'll stop by. Maybe talk about that charcoal retort your uncle had! LOL! MARK -
Check both batteries for 12.2 to 12.8 volts unloaded. If one has a shorted cell due to a plate warpage it will not register full 12 volts even when your charger says it is fully charged. One shorted cell will kill the two batteries when tied together in parallel. When your engine is running it uses 12 volts to run ignition properly. Low batteries can cause a skip at low rpm because your alternator is turning slower with lower output. Any draw from accessories will pull enough away from the alternator at low speed to kill the ignition primary. It needs at least 11 volts to keep running. Check your alternator out put amps too if you can find a meter. Mark
-
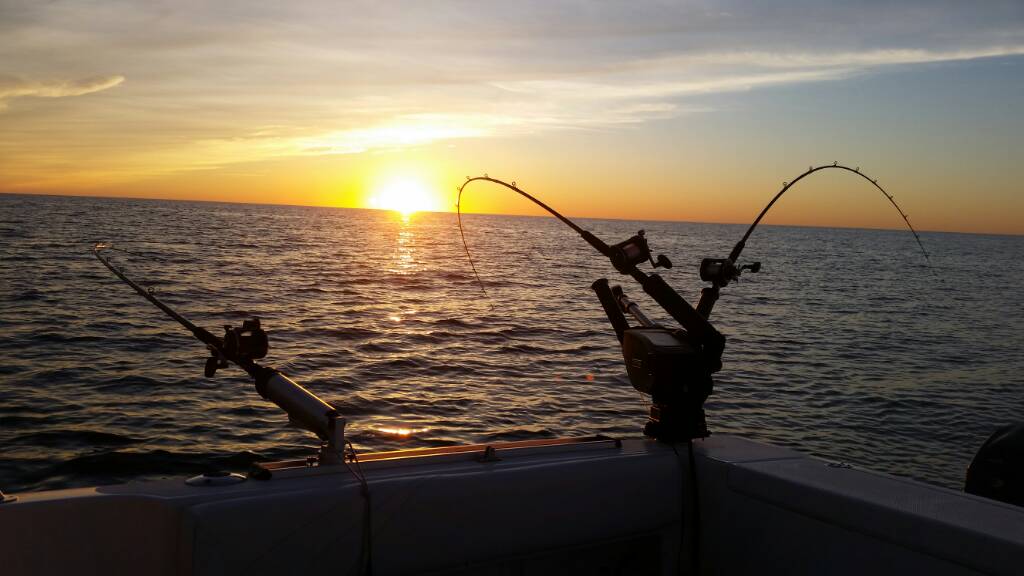
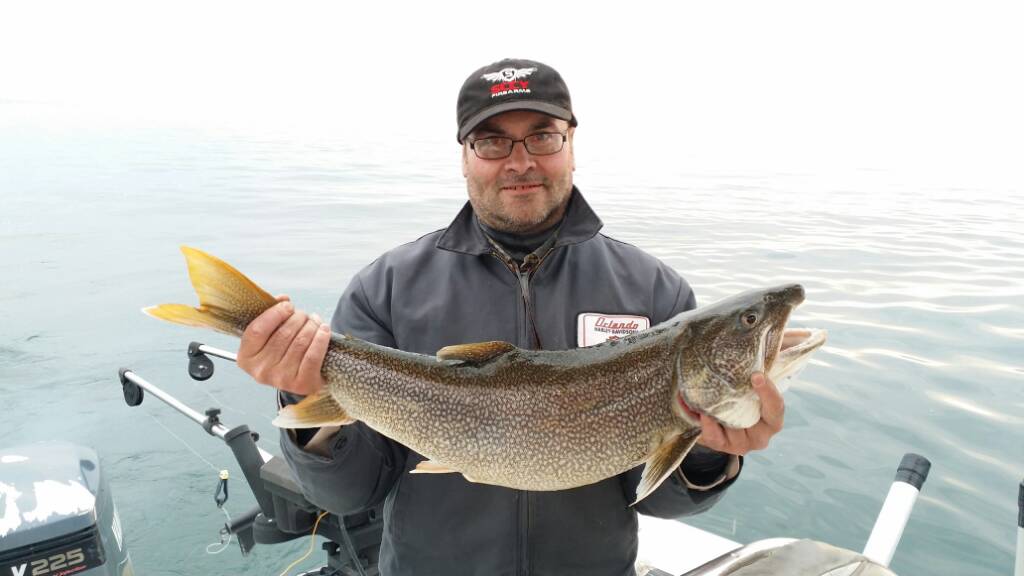
Finally got out on the water. Didn't fish right there at the Oak though. The color was gone and clear water had moved in after the east winds and storms from last Sunday. So went east all the way down to Devil nose and found some color that had blown back west from Sandy and Braddock. It was a little deeper than last weeks reports and we set up in 150Fow and trolled back west towards port. Didnt set up until 5:30pm. Color was good out to 230 feet and we trolled 4 spoons off riggers and one flasher fly on a wire diver set on 3 out 175. There was a pretty good screen in that area just west of the nose. Fish and bait all 80 to 110 feet down. We managed 2 nice lakers from the wire diver f/f and the Moonshine mag running 60 down. The Coho came on a spook with Lazer ladder back tape down 80 ft on the ball. Picked up by 8:00pm and headed back. Surface temps around the nose were in the 51 to 54 range. The Oak was colder at 46 and clear enough to see bottom in 20 feet of water. Steve has fun with his first ever Lakers.
-
Yup all true, the two compositions are definitely gonna run different. I'm not sure that one would affect the other adversely as long as they are on the same axle bias in front or back not mixed side to side. Circumference would be the greatest concern due to one set larger carrying more weight than the other. Mixed brand tires of the same size profile seldom have the same overall inflated circumference and footprint. Better to use common size from same manufacturer than mixing. Still in a pinch it could work for local running.
-
I'm a little different...besides that, the way I do copper is probably... since I have premeditated using the copper in the beginning of the trip, I like to deploy my coppers first at a speed of about 5 mph. They lay out better and faster and the boat has better directional stability. My probe will tell me what copper to use. Then the boat slows to 2.5 and the divers go out snails pace. Outside on 3 first then inside on 1.5 all snail paced to about 125 to 150 feet and settled there. The rest of the riggers go down last cause they are the least of the trouble and less concentration to detail. The divers are then slowly adjusted to desired length. Having the boat going too slow will cause many issues that create FUBAR. Coppers sink too quickly, divers will spin out of plane and circle downwards in giant whirling corkscrews grabbing other lines. Good boat driving skills includes not just steering but maintaining speeds to keep divers in plane. Those are the worst for causing mayhem and grab things while spiraling down. Copper just sinks and if they are on out riggers or boards then they hit divers that are spinning down. Try not to stall on speed at all costs! Even some wild short duration steering will not cause as much trouble as long as you are moving at a good pace 2.7 to 3 mph. Mark
-
Probably, but I would make sure that the overall circumference is close between all four, even if they are the same size tires.
-
Nothing around here in Medina area. Not with the ethanol plant in the back yard. That would be unholy..
-
next time leave both wings on the chicken... It will fly straight off instead of spin with one wing.
-
-
Yeah, I hear ya on the burnt wood smell. Seems to permeate everything even skin! I go to bed at night after shower and she says I smell your barbeque, but it's been cold for hours! Lol! I'm gonna try to get a 55 gal and 30 gal. drum and try that with a stack. Vent the bottom of the larger can and have the lever clamp top with a hole in it for flue. drill a line of holes around the top under the rim for air to draw up the flue and secondary burn any gasses going up the stack. I think the small barrel will seal just enough upside down in the large barrel to let gases out in the bottom of the larger one to perpetually fuel the system after the main tinder is gone. I believe you are correct about very dry wood to start with. Also a hot dry day no wind would be most effective. Great for standing around a 1200 degree heater! Ha! My intention for making charcoal is to just be able to use a specific wood for smoking meats in a side fire box pit without actually burning the raw wood. Raw wood needs tending alot to get the right smoke. I like to get a thin blue smoke but raw wood makes a lot of white smoke and needs fiddling with draft... and of course ash and creasote. Those can put an off taste in meats. Beside who wants to eat that creasote!..thats why I fondly refer to barbeque as "food from the flue" ..lol!. Some brands of lump charcoal have had scraps of laminate lumber in them. I don't want that stuff cooking my 50 dollar premium choice brisket! When I find some barrels and get the wood I'll try and get a report up on it. Mark
-

Would like to pick your brains
skipper19 replied to JimB's topic in Questions About Trout & Salmon Trolling?
Watch for the birds when water temps are cold. Many times the birds are wheeling around an area the size of an acre of water. Generally it's an indication of feeding action in a warmer pod of water. Most of the time I have witnessed birds wheeling around and diving to the surface and not sitting on it, there has been salmon or trout feeding on bait fish there. Last year, while fishing the slam out of Olcott west, we ran into a pod of warm water being pinpointed by birds feeding on scraps. We trolled into the area and at 55 feet of water, the temp raised, we made a turn to run through again because we marked a huge pod of bait with hooks nearby. Adjusted our depth to match the bait and hooked up on a king that was one of our largest of the 7 we needed. The wind was east the whole week making it hard to find needle in the haystack temps. Just another visual way of keying in on a warm pod early season. The bait will be there and if they are being attacked, the birds are not far from the leftovers. -
With the fishhawk, if you lower the unit just under surface, running in clean water, not in prop wash, and compare the reading to gps, you can calibrate the fish hawk to the gps reading. Surface water will be your most stable water without a lot of current. You can double check with your surface speed on the sounder triducer as well as calibrate the water temp to read same as your sounder, if you know that the sounder readings are correct. As far as depth at the fish hawk, I can't say from experience if it is a real advantage. Generally speaking with the downrigger weights you use the amount of blowback is always going to have a different depth than your counter is saying. In my case I can always see the weights on the sounder unless a really strong current or speed is pushing them back. Usually on depths over 80 feet. In that case maybe depth would be an advantage. For me, I just go deeper if I'm marking fish that match the downrigger depth counter. Just another guess but mostly intuitive. Mark
-


